My latest obsession: CONTACT PAPER

If there is ONE thing you should know about me it’s that I am….

I.M.P.A.T.I.E.N.T.
(when it comes to decorating and DIY that is). 

Remember the “lovely” sewing job I did making my son’s drapes:

IMG_5416[1](“Ralph Lauren Inspired: DIY Nautical Drapes”)

OR….How I updated the pillows in our master bedroom:

pillow_collage(“Using What You Have”)

Whenever I start a project I want it done almost immediately.

I am not one of those admirable women (or men!) that accomplish all-things DIY by following a great number of steps (or  directions…just ask my husband and mom!)

Anyway, that is why you will see projects on my site that involve as few steps as possible and are pretty pain-free.

With that being said….I introduce you to my newest obsession…

CONTACT PAPER!!!

contact_paper

The patterns and colors that are out there right now are pretty amazing.

contact_paper(Source: Beauty for Ashes)

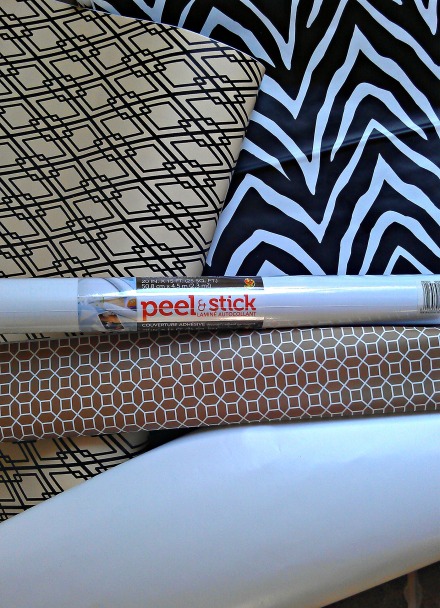
My awesome friend mailed me a TON of contact paper (the first image is my stash) as an early birthday present.  As soon as the box arrived I ran around the house like I was my 3 year old after he eats ice-cream.

Here are some things that I have done with it SO FAR…

IMG_5735[1]Most recently I stuck some plain white contact paper onto the drawer fronts of my son’s IKEA dresser for a funky look.

Here is a before and after:

dresser.This project took me 45 minutes and it couldn’t be easier:

1. Remove the knobs from the drawers.

IMG_5381

2. Measure the width and height of the drawer and add at least 1/2″ to each side.  Now cut your piece.

IMG_5383(thank goodness for these grid lines…I can’t cut a straight line to save my life!)

3. Peel back about 2-3″ of the liner and place on the drawer front so apx. 1/2″ overlaps.

IMG_5384

IMG_5387

4. Once you have it on pretty straight start smoothing out the air bubbles.  I found that my wallpapering tool works best for this!  I have also used my daughter’s 3-ring binder as well and that worked like a charm.

5. Once all air bubbles are pretty much gone (I couldn’t get 100% of mine squeezed out, but who cares) use a sharp blade to trim the excess off each side.  Just run the blade down the side of the drawer and it should cut like “butta.”

IMG_5442

6.  Now it’s time to re attach the knobs.  I took the screw to one of the knobs, gently pushed it through the hole on the back of the drawer so I could tell where to make a little hole with my blade.

IMG_5446

7. Now just re attach the knob and admire your work!

IMG_5735[1]

Here are some more fun+ quick ideas for using contact paper:

IMG_6014[1]

Covered switch plate covers in our first floor bathroom.

IMG_5990[1]

IMG_5991[1]

Since contact paper is basically a very large sticker, there’s no commitment phobia.  I stuck my last piece of my favorite Moroccan style paper onto the wall behind my daughter’s book case.

IMG_6028[1]

IMG_6027[1]

Last but not least, I stuck the zebra pattern onto the side of the kids’ toy storage for a little fun.  The overlay you see is from Myoverlays.com. I simply spray painted them gold and attached with duct tape (did I mention that I am impatient…it was the closest thing I could get my hands on!) I then used my utility blade to cut out the zebra paper that was inside the overlay, leaving the shelf itself showing.  You couldn’t really see it otherwise.

Fun, huh?  It’s the best stuff for a quick change to just about anything you want to give a little makeover to.  It’s commitment-free and it doesn’t have a high-tack adhesive so it’s easy to remove when you’re tired of the look.

Have fun!!

signature2

A Cool Way to “Test Drive” Paint

I had to run to the hardware store today to get an extra set of house keys made and…

…lo and behold…

I wound up in the paint department!

And left without my set of keys!

I wish this was the only time something like this has happened.  It happens daily.

Anyhoo…

I am in the middle of at least 5 different projects around the house and thought, “Oh what’s one more??”

This is a picture of our formal living room and it is the first room you see when you enter our house:

 liv_rm

One of the most frustrating things to me about moving into a brand new house is every single wall is WHITE!  I know some of you are shrugging your shoulders maybe thinking, “And the problem with that is…?”

Well, in a nutshell I LOVE COLOR!

I wanted to go bold in this room, but have been wracking my brain about what paint color to choose.

Very common problem.

While I was in the paint department today I spotted this cool thingy….

paint_film

This is simply a paintable piece of 9″ x 12″ clear film.  One side is paintable and the other side has a low-tack adhesive so you can take it off one wall and try it on another.

And it costs $0.98!

In a nutshell, this film allows you to “test drive” your paint before totally committing to it.  I bought a sample size of the paint I was drawn to (apx. $3.50).

paint

Color is very difficult to translate via pictures.  This color is navy+gray+green and I kept staring at it.  So for a total investment of $4.50 I bought a sample of it and the SureSwatch and brought it home to get started!

film

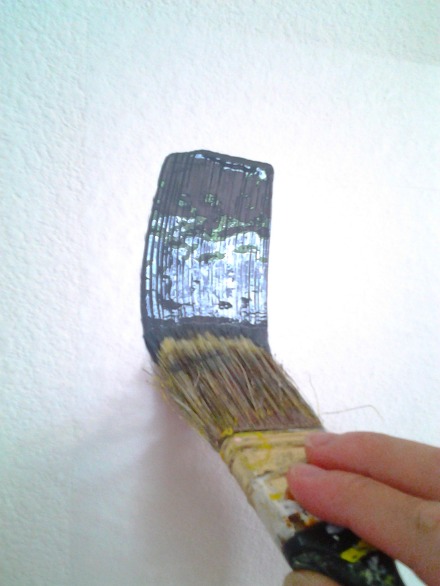
Being the rebel that I am, I ignored the directions and slapped this thing on the wall and then painted.

painting

After 15 minutes, it’s dry!

hand

film_better

Here is a better picture in a very sunlit area of the house.

I really like this product and will use it again.  For a minimal investment of $4.50 you can make sure that paint you love is really for you.

This one is so stay tuned for an upcoming living room makeover!!

liv_rm

signature

CRAIGSLIST Makeover: using chalk paint

We have a huge empty space in between our living room couches and my dream purchase would be something like this from Restoration Hardware to fill up the space:

RH table

 These tables start at $995 on sale!  Not gonna happen in my world.

So my craigslist scouring began and I kept coming back to round oak clawfoot tables (I guess everyone is trying get rid of these as there are a TON for sale).  My husband thought I had completely lost my mind when I told him I was going to purchase one.  Honestly, I thought I had lost my mind too!

So I took the plunge and purchased one for $60.  The sweet woman I bought the table from threw in two chairs for free (more on those in a minute). 

I forgot to take a before shot, but this set is pretty much identical to what I purchased:

before_overlay

I might have mentioned this before, but I am pretty impatient when it comes to projects.  I am great at starting them, but finishing is another matter.  So, when I found out about chalk paint I was hooked!  You do NOT have to prime or sand your wood furniture beforehand.  You just slap it on, wax it, buff it and you’re done!

I bought a sample jar of Annie Sloan Chalk Paint in French Linen from Perfectly Imperfect.  A 4 oz jar only costs $11.95 and I painted the entire table with it and still had some left over!

photofrench linen

Source:  Perfectly Imperfect

You also need wax to permanently bond the paint to your piece of furniture so I picked up both the clear and dark waxes.  I wanted the dark wax to bring out the details and lines of my piece and to also add some character.

wax

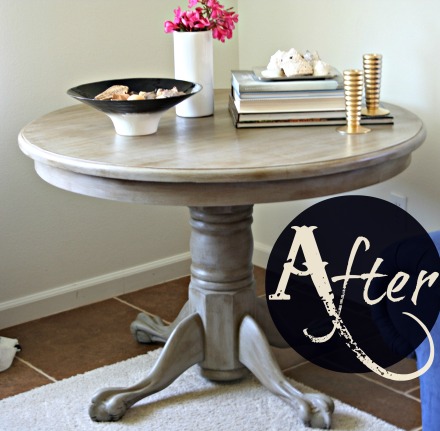
Once my paint and waxes arrived I have to admit I was a little nervous.  But, my motto is “it’s just paint!”  So I painted the entire piece and let it dry overnight.  Next I applied the clear wax, let it sit for about 1 1/2 hours then buffed it to a satin shine.  After that, I added the dark wax in places I wanted to add that “extra something.”  So after two days, this is how my table turned out:

after_overlay

closeupcloseup2table2

Again, here is the BEFORE:

before_overlay

And the AFTER:

after_overlay

And just for fun, a side by side comparison of RH and mine:

RH tabletable2

I used chalk paint in Provence on the two free chairs I got and this is how those turned out:

chairs_beforetwochairs

BEFORE  & AFTER

chair_closechair_top

Have you ever used chalk paint before?  If not, would you consider it on an outdated piece or one that is headed for the dumpster?

signature

GUEST BEDROOM MAKEOVER: In progress

In just under one year (we moved in July, 2012) I’ve managed to touch every single room in this house….except…the guest bedroom.  We have had a consistent stream of visitors (some that have even stayed with us for months) and I have just now gotten around to decorating it.  Looking at these “before” shots I’m quite embarrassed that I didn’t make this room priority #1.

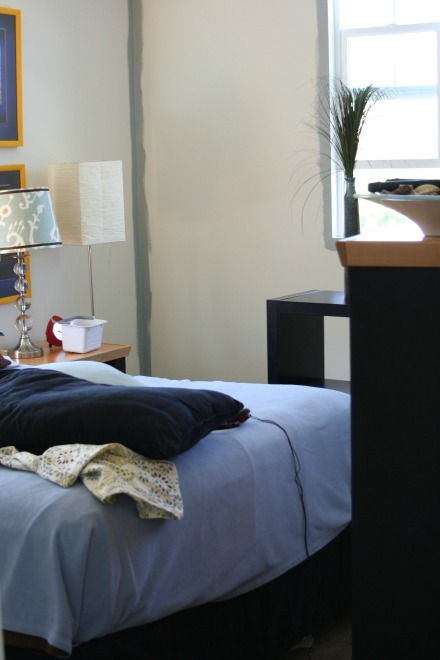
Anyhoo…I got “that itch” (know what I’m talking about?) this past weekend to finally give this room a fresh coat of paint and some desperate accessorizing.  I’m proud to say that the only thing I bought, other than paint, specifically for this room was the black bed skirt I ordered from Target.

The rest of the room was decorated by stealing from other rooms in the house.

Entering the room Looking into the guest bedroom

before before2

Every inch of our house is painted with bright white, flat paint.  Having two small and very active kids I can honestly say I am NOT A FAN!  If you breathe on it wrong it shows smudges!  So, the first thing on my list was to paint the room a nice soothing smoky blue.

during

During the painting process I enlisted the help of my two little DIYers in training (notice the smiley face?)

during2

I am a very impatient person so the “during” process is always a bit stressful.  I just want it to be DONE!  Thankfully this room only took two days to complete.

after

After painting was done now it was time for the fun part…accessorizing!

bed

It took a while to find the right mix of pillows, but I like this look (for now).

bed2

pillows

dresser

black_shelves

blanket

pics

shoe_form

bed2

This room is still a work in progress, but I am already liking where it’s going.

Next I will be adding drapes, painting the dresser and nightstand handles and re covering the lampshades in a more neutral fabric.

These are my inspiration photos for the drapes and handles (we’ll see if I can pull it off):

Source: Sarah M. Dorsey Designs

Pull 3" Center-to-Center - Acrylic/Brass (#82904) by Laurey Hardware

Source: Cabinet Parts.com

Stay Tuned…Part Two coming soon!

signature