blogging [and my final post on amykristinteriors]

Behind every piece of art is a human being pouring their soul into it.  Behind every blog is a dedicated human being sharing a special part of themselves with the world.  It’s like being naked for people, complete strangers, to judge, critique and analyze you.  Just after I click that “Publish” button after finishing a post I feel completely naked, exposed and vulnerable to criticism.  But, I keep posting and sharing my ideas- some pretty cool, some just plain weird.  Why do I do it?  Why do any of us do it?  For me, blogging is a tremendous creative outlet and one that I crave.  Until I discovered blogging I always thought I was weird because I re arrange the furniture in my house constantly, change styles constantly, paint constantly…you get the picture.  Blogging is a community where I feel I belong and can relate to other creative people.  It might have taken me 40 years to get here [and many career changes – I’ve been everything from an administrative assistant in a paper factory, house painter, to Realtor and owner of my own tiny graphic design business] but I found my true passion…design [and blogging].

This is my final post on amykristinteriors.com.  If you didn’t catch my post the other day then you may not know I now have a new blog site:  www.amykrist.org.  It may sound like a small change, but it’s a pretty big deal to me.  I did have a lot of help initially setting up my new blog and moving all of my files over, but what you now see is my design, a header I created myself, self portrait, etc. It’s my art, my creativity and it’s all hanging out there for the whole world to see and critique.

hugs

my first vintage finds

So after my rambling the other day, I mentioned that I made a trip to a local+funky vintage shop.  Since I am just venturing into the whole mid-century modern thing I decided I should probably take baby steps so I was very thankful that this shop is tiny and not jam-packed.

amy_krist_interiors: "Heaven."

[via my instagram feed]

I found this place after spotting a few amazing mid-century modern pieces on craigslist that I absolutely loved (and the prices of his vintage treasures were jaw-dropping).  Here are some pics I snapped of his amazing stuff

vintage desk

vintage credenza

vintage green beautyCrazy right?

vintage toys

vintage typewriter

You know you’re old when you used a typewriter and now see them for sale in vintage+antique shops!

vintage chairsdrool.

vintage hair dryerthe funniest hair dryer I’ve ever seen

Here is what I came home with

IMAG2868

The lamp bases are not technically MCM, but they are such a gorgeous color (almost a bronze) and metal.  I paid $40.  I love vintage hard back books (who doesn’t?) and bought 3 for $2 each.   I love love love armillaries and when I spotted this vintage one I snatched it up.  The little ornate box is something I never thought I’d buy, but I kept picking it up, putting it down, picking it up, etc.  When I do that I figure there’s a reason so I grabbed it and paid $10.  For under $80 I came home with some unique things.

The hard part was finding just the right spot for each.   After much trial and error here is where their new homes are

vintage_lamp end table

vintage lamp_detail

vintage_lamp behind couch

vintage_blue couch

vintage_sedgewick2our buddy “Sedgewick”

vintage_box styled with books

vintage_box

vintage_armillary styled

vintage_armillary side view

The owner of this shop is not only super cool, but very knowledgeable about MCM.  He also said something that struck a cord with a me, “Mid-century modern is one of those design styles that people don’t realize they love.  Once you purchase a piece of MCM furniture you instantly become hooked.  MCM evokes an emotion and just makes you feel good.”

‘Nuff said.

hugs

unique updates to the kids’ bathroom

I can’t believe I can honestly say that I FINISHED a project!!  Oh happy day!!  Usually I have the attention span of one of my children whenever I start any elaborate project.  This means I have a stockpile few projects either laying around our garage, or staring me in the face inside the house.  BUT…I must have found something captivating about the board and batten in the kids’ bathroom, as I finished it within days and not months.  I took these pictures at night which explains the funky colors.

kids bathroom_board_batten

kids bathroom_hooks

All done, right?  Yeah right.  How come when I finish a project there is usually a trail of little projects right behind?  Notice the blue wall?  I will probably finish painting the rest of the bathroom…umm…

So anyway…I always found it strange that there are no towel holders right at the sink.  I can’t stand the idea of washing your hands then dripping at least a cup of water all over the floor in order to dry them.  Not to mention, I am that paranoid mom who worries about the kids slipping on the tile floor and smacking their heads.

I used something a little unconventional to solve this problem.  Hold backs and a curtain clip.

kids bathroom_hold back2

kids bathroom_hold back

I purchased these hold backs from Lowe’s and the curtain clips were a Big Lots purchase.

kids bathroom_towel

Why the curtain clip you ask?  Well it keeps the towel nice and neat, easy to access, off the counter top therefore keeping the clutter to a minimum, and it’s just different.

On my list of things that I would love to do to the house is create frames for each of the mirrors in our 4 bathrooms.  I am not the biggest fan of the builder grade mirrors as I think they’re an after thought.  I decided to take the cheap and easy route and do something a little different and hang a picture in front of the mirror in the kids’ bathroom.

kids bathroom mirror

Notice what is “holding” up the picture?  I unscrewed one of the crystal finials from the hold back and screwed it into the wall.

kids bathroom_crystal finial

It is secure enough and won’t be coming down without some tugging, but it cannot hold the weight of this picture.  So I hammered a nail into the wall, hung the picture from that and screwed the crystal just underneath the nail in order to camouflage it.

kids bathroom_nail

I stapled some jute rope to the back of this canvas in order to suspend it right over the mirror.

kids bathroom_art hanger

Then this always happens mid-way through a photo shoot…one of them always finds me…

kids bathroom_ninja turtle

I do like the way the picture looks and it also serves a secret purpose.  It acts like a dividing line for the kids to stay on their own side of the bathroom, especially during teeth brushing.  Don’t ask me why, but brushing teeth brings out the “best” in them.  I have to say since I’ve had this picture up, it’s been a little calmer in there.

I don’t however like the picture itself (it was a cheap Home Goods purchase), plus it’s not very fun for a kids’ bathroom.  So I have plans (oh surprise, yet another project in the making!) to wrap the canvas in a funky print and wrap the jute rope in gold duck tape.

kids bathroom_new look

hugs

My New BLOG!!

red_coral_turqcropped[click here to see my new blog]

I can’t believe I am finally writing this post!  If you have ever created your own blog (hats off to you!) then you know how time consuming and frustrating it can be.  I made the decision to not only change the name of my blog, but take it to the next level!  Here is a brief explanation why.

First off, my old blog was created in WordPress.com.  It has been such an eye-opening and learning experience. WordPress.com however is very limited.  In other words, I NEED PLUGINS!!!  Even though I have only been blogging for less than a year I felt like I had taken my old blog as far as I could.  I plan on sticking around for a while, as I have so much more to share, so I took the plunge and went to WordPress.org.  I know it sounds like a small change, but oooohh trust me, it has been a labor of love for the past 3 months and that’s putting it nice!!

I want to address something that has been bugging me since I started blogging.  If you have written me a comment in the past and I have never responded, first let me say a huge, “SORRY!”  I have been screaming at my computer because there was no way to respond to a lot of you.  It’s a long, boring story, but the gist of it is there were two ways to leave me a comment and one of those ways did NOT let me respond.  So, please know that if you leave me a comment on my new blog, I promise to respond to each and every one of you!

I will be phasing out my old blog over the next couple weeks so be sure to sign up over www.amykrist.org if you still want to receive my posts.

I’ll end by saying that I am looking forward to growing this little blog of mine and am excited about the future. I certainly hope you’ll stick around for the journey.

I look at myself [and my blog] as a work in progress and try to adapt to change as best I can.  I’m taking that next step forward and I can’t wait to see where it takes me.  Care to join me?

hugs

venturing into mid-century modern

Do you ever try out a new decorating style only to detest the very sight of it shortly thereafter?  I have tried so many different trends/styles hoping I would have that “Aahh Haa” moment and guess what…NOPE!  (Bear with me, I just need to ramble as usual for a bit).

Shortly after move in day at our new house I got busy trying to make this house a home that reflects who we are.  Sounds simple.  But if you’re someone like me who second-guesses every design choice and gets bored easily, not so much.

SHABBY CHIC:

My first design love affair was shabby chic.   Great style if you don’t over do it.

Console-table2[via]

I thought this was the direction I wanted to go with our house so I purchased an old oak claw foot dining table from a sweet lady who had one for sale on craigslist.  I purchased some AS Chalk Paint in French Linen and got to town.

Here was my first attempt at shabby chic:

table2

I really do love the way this turned out, especially knowing how it looked (and smelled) when I bought it.  While I still have this table in the exact same spot I’m having serious doubts about it now.  Something is just “off” when I look at it paired with our cobalt blue sofas.  Once I start to second guess something you bet your sweet booty that it just wasn’t meant to be.  Always listen to your gut.

TRADITIONAL / ANTIQUE

Boy, this trip to traditional was the shortest lived.  My husband grew a few gray hairs when I started bringing antique relics home.  [He’s a modernist all the way].  I don’t even remember what inspired me to venture here, other than testing it out to see if it stuck.

Back to craigslist again!  I found these beautiful antique (huge) end tables for sale and dragged my kids along to purchase them.  I should have known to trust my gut and not purchase these.  I think my daughter even knew these things weren’t really my taste because she said, “You’re gonna buy THESE, Mama??!”

IMG_6139[1]

couch2

I was also never in love with them because 5 minutes into our drive home my kids and I started complaining that they stunk of cigarette smoke!  The seller never disclosed this and I never bothered to give it the smell test while I was at her house.  Lesson learned.  I went through box after box of baking soda to try and rid these poor guys of their odor.  Cigarette smoke is a nasty, clingy, unforgiving odor, but I eventually was victorious.  I had the same feeling about these end tables as I do with the clawfoot table…something is just off.  So I sold these to a sweet friend!

I scoured and trolled craigslist, eBay, garage sales, you name it to find the perfect end tables.  Nada.  During one of many late night Pinterest binges I stumbled on these beauties and had that “Aahh Haa” moment.

endtable_styled-copy[via]

Hmmm….something just felt right when I made two of these end tables all by myself.

IMG_6103[1]

IMG_6123[1]

Things were starting to click at this point, but it wasn’t feeling 100% like me (I mean, us) yet.

CONTEMPORARY

The turning point for me venturing into this design style was those end tables.  They can go with modern, rustic, shabby chic, eclectic, you name it.  I liked the simplicity of the design and loved the clean lines.  Hmmm…this feels right!  I decided to embrace contemporary design wholeheartedly and pushed myself to tackle an entire room makeover.  Holy crap!!  What safer place to experiment than my youngest child’s room!  Mean Mama.

By this point I had a nice collection {hoarder’s paradise} of contemporary fabrics on hand and incorporated some into his room.

IMG_5728[1]

 That “chipper” ikat fabric is still one of my favs.  Things were starting to feel comfortable and I liked the way his room turned out.  The only thing nagging me was that I felt like I had seen this style and look on countless blogs.  I have always had a rebellious streak in me and the last thing I want to do is be like everybody else.  This brings me to my last design stop….

MID-CENTURY MODERN:

I have never been drawn to mid-century modern, much less know just exactly what the hell it is.  While in a design slump/block, I decided to scour the blogosphere for some pick-me-up.  Don’t ask me how, but when I landed on this blog I finally had my “Aaah Haa” moment!!!

It was this image that stopped me in my tracks

gallery-wall-in-living-room[via]

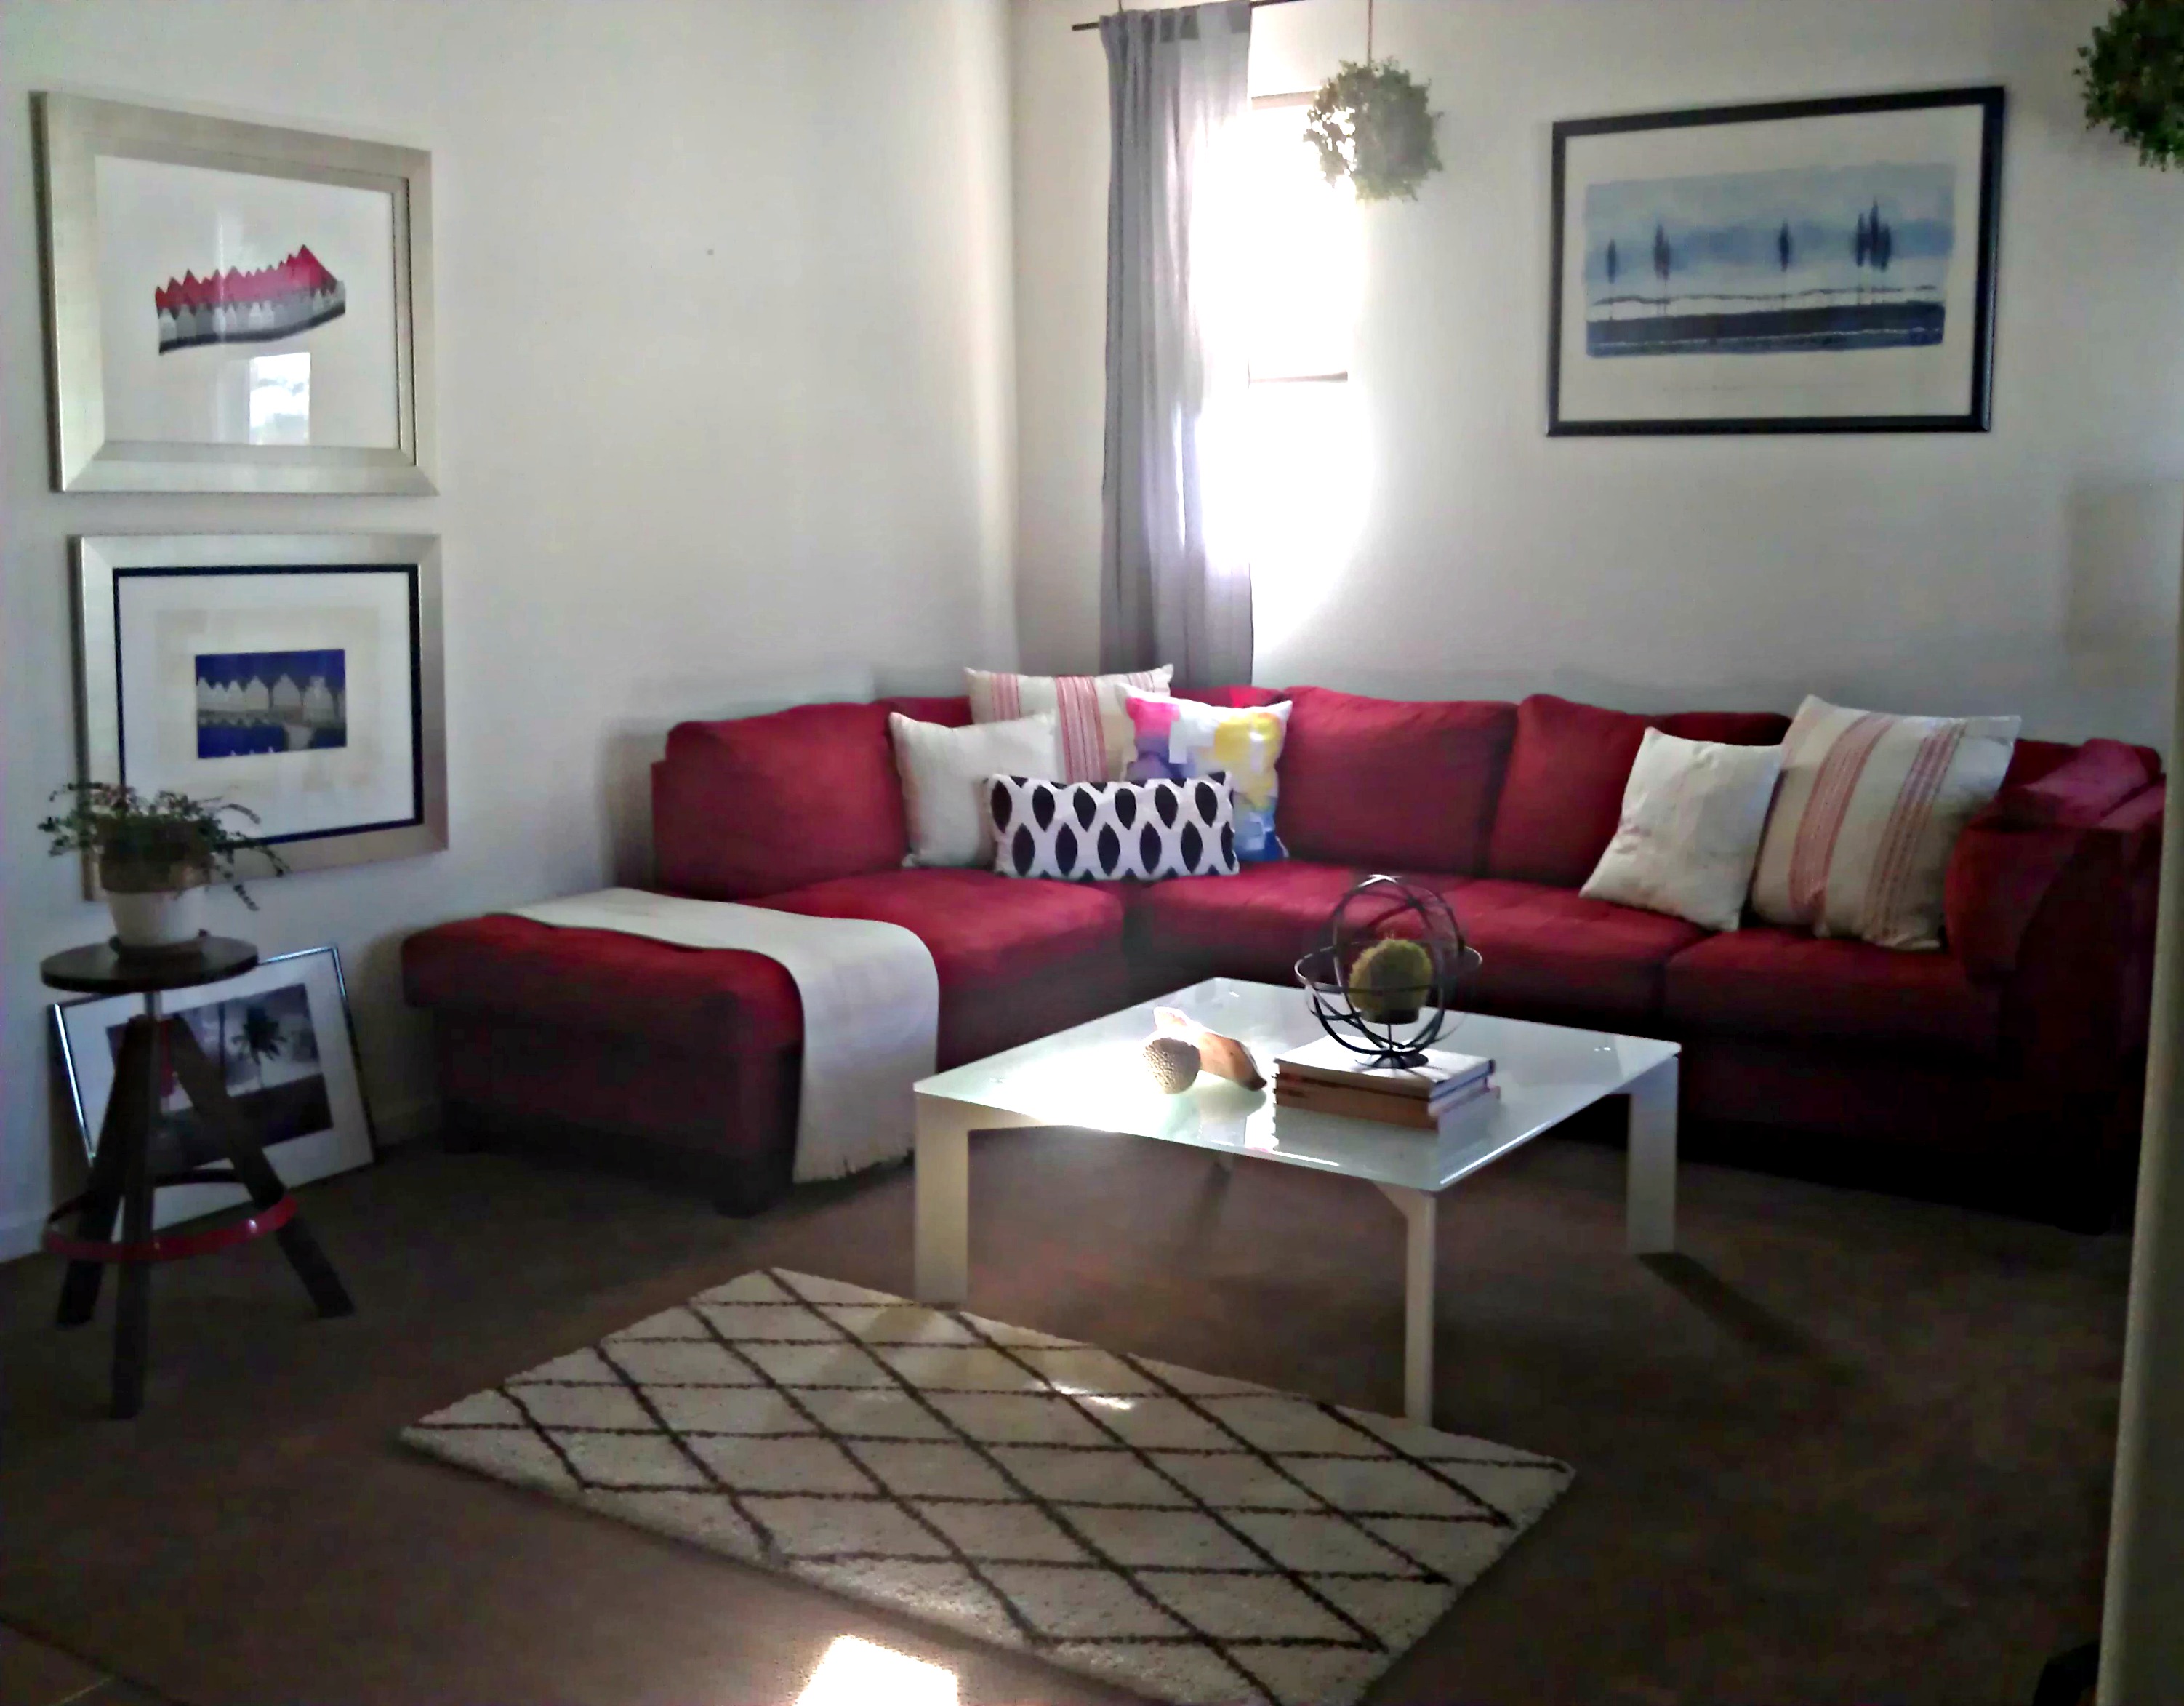
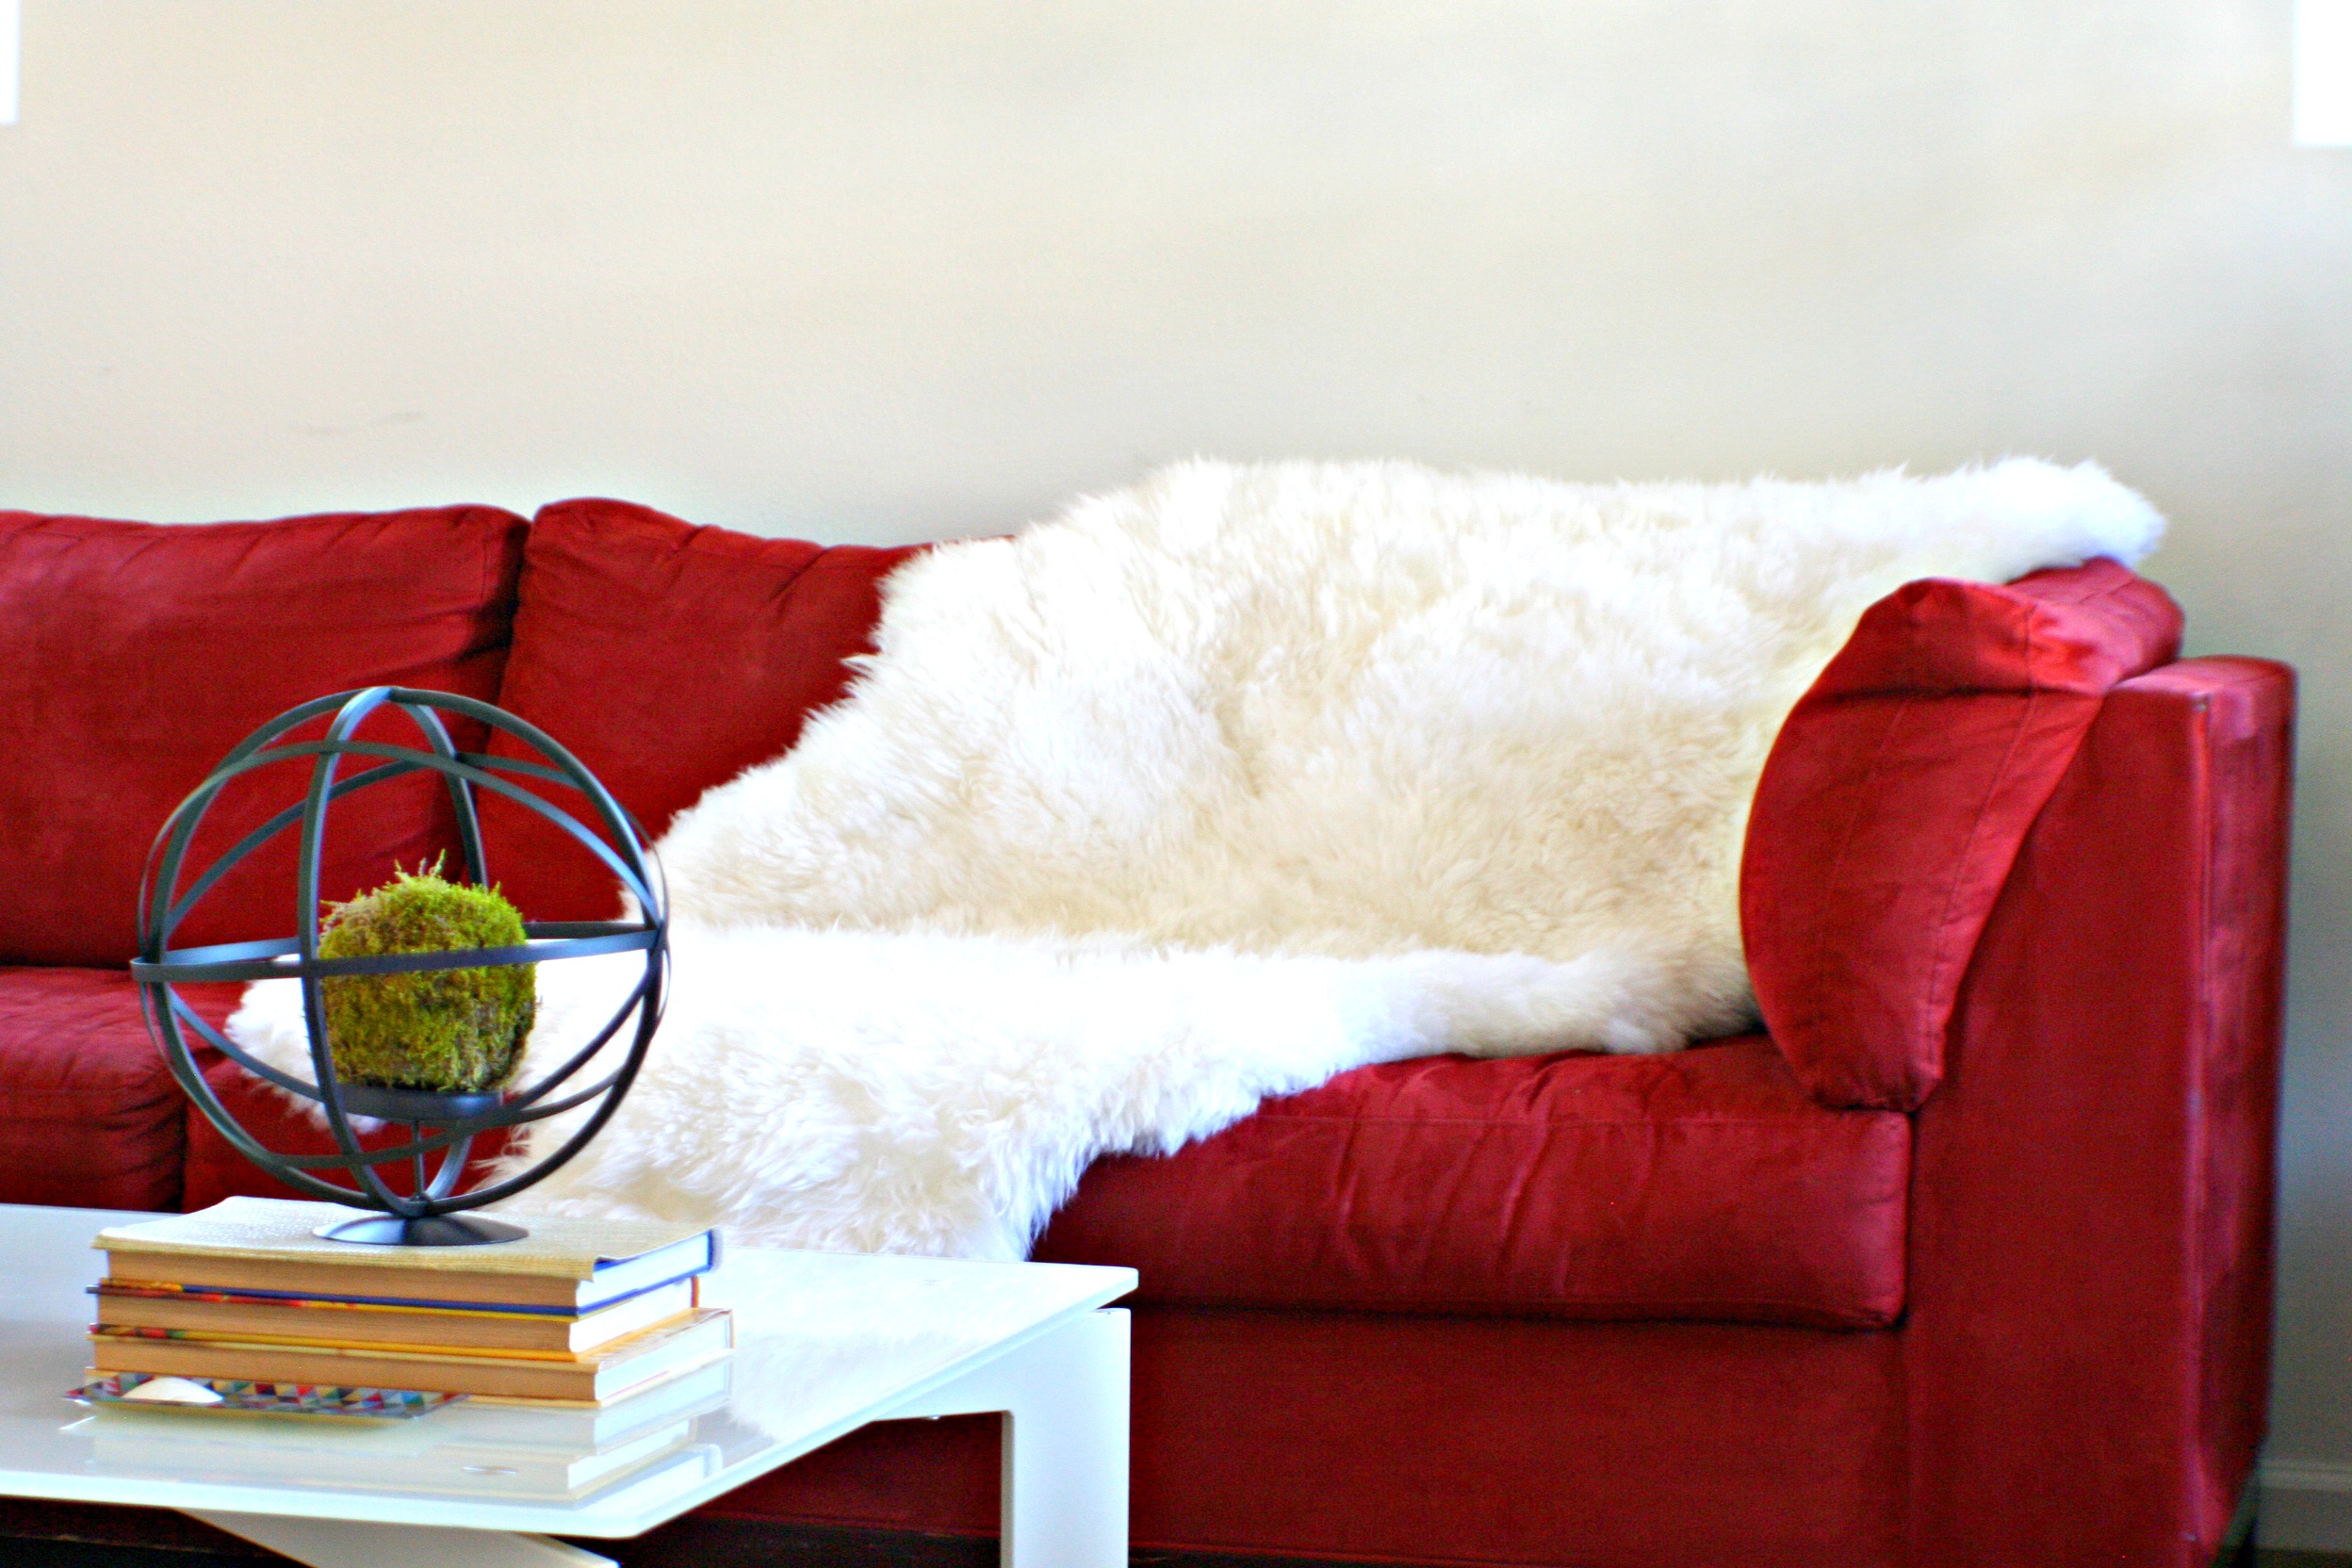
YES! YES! YES!  I still refer to this room as one of my all-time favorites, mainly because there is a cobalt blue sofa staring you in the face.  I have never known how to decorate with our blue sofas until I found this picture.  I mostly love the mid-century modern chairs paired with a modern b+w rug and oh-so-done-right gallery wall.

Here is a recent picture of the family room after finding my inspiration

fam_room4

The eclectic mix of this room is perfect and I am now venturing into the mid-century modern world.  It’s a very foreign and intimidating style for me as I think it can look too theme-y if over done.

So, I made my first trip to a cool vintage store about 30 mins from our house this week and purchased a few things that I had my “Aahh Haa” moments over.  I will be posting about them very soon.

I guess my point to all this rambling is it’s perfectly normal (and quite healthy I think) to test many different styles.  Who knows how long my love affair with mid-century modern will last, but it’s fun trying out new things and pushing yourself out of your comfort zone.  It’s what keeps life interesting!

hugs

our living room

So I thought it might be time for an actual room post.  Today I’m sharing with you our formal living room.  I feel funny even calling it “formal” because there is a.b.s.o.l.u.t.e.l.y. nothing formal about this room at all (I guess that’s what we call rooms nowadays that get little use).  It’s the first room you see when you enter our house. The first three pictures are older ones and the way our living room looked a couple months ago.

red_couchThis red faux suede sectional was purchased pre-kiddos and has held up pretty well despite all the vomit and other DNA embedded cooties.  I’m hoping it’s gone-zo sooner than later though.

picturesThe jute rug was a craigslist purchase and has been moved to the guest room.  I also re located the IKEA arc lamp to the family room.

curtainsI also swapped out a few pillows for brighter, more funky ones.  The pillow swapping is a disease!

So here is the way our living room looks like (as of this afternoon).  If you’re anything like me, this room will be different by tomorrow.

living rm_couch2

living rm loveI love my new “LOVE” pillow from One Kings Lane.  This was on sale and it looks like someone painted it with watercolors.  I love the funky vibe it adds to the room.  I’ve also admired the look and feel of throwing a flokati rug on a chair or couch and thought I’d give it a try.  The jury’s still out though.

living rm rug drapes

living rm rug

living  rm_topiaries

This room is my first experiment with ceiling mounted drapes.  The ceilings in this room aren’t super tall so I wanted to hang my OLD IKEA panels as high as I could to give the illusion of high ceilings.  I got a little goofy one day and tied my self-made topiary balls from the drapery rods because…well…just because.  The jury’s still out on that one as well.

living rm top ball

living rm_couch

The starburst mirror (doesn’t everyone have at least 2 of these in their home?) was a DIY I made from balloon sticks, wood circle disc and IKEA mirror.  This sucker is huge but I needed something large to eat up the bare wall space.

living rm mirror

living rm entrance

View from the front door

I hung an antique mirror on the wall right when you open the door.  This mirror has been in my family forever and I always love getting the door, checking my make-up and wondering how many ancestors did the same exact thing.

living rm plantstand

This stool was a recent Home Goods purchase and I couldn’t believe it was only $40!  This thing is so versatile, but I like it best now as a plant stand.

living rm coffee tbl2

“The White Beast”

I say that not because it’s an eye-sore, but because it weighs as much as our car!  This was yet another IKEA purchase about 8 years ago.  I love this coffee table and would love to have it in our family room, but my son has two chipped teeth from this thing already!  I will be mentally ready to re introduce it to the family room probably in another year (or five!).

living rm coffee tbl

living rm orb

The decorative orb was a Z-Gallerie purchase ($25) and the tray was a Joss & Main purchase ($15).

living rm chair

This chair was a craigslist purchase and I dragged my poor kids in our little VW along for the joy ride.  I felt like one of the Beverly Hillbillies bringing this chair home because I drove 35 mph the entire 23 miles home with this thing sticking out the back window.  Ooooh the stories my kids will tell about their crazy Mom someday.

living  rm pillow

This pillow is similar to my “LOVE” one and was purchased from the same sale on One Kings Lane.

living rm chair lamp

This end table and lamp were Home Goods finds.

Well there it is (for now!)  I do have some plans for the room as it is definitely missing something.  I would love to do something like this on the wall where the starburst mirror currently is…

IMG_9048[via]

I’ve asked Santa for a power nail gun for Christmas so I could bang this out in a few days.  A girl can hope.

hugs

Making over IKEA pots

ikea vase_overlaygold embellished IKEA pot

Hey guys!  Sorry for the lack-o-posts lately, but I have something pretty major (aka- time consuming like having another child) in the works and I promise it’s worth the wait!  At least I hope so.

So in my quest to make over this brand new builder blah house I’ve come to the realization that NOTHING is off-limits.  If you don’t know this about me by now, the fam and I recently moved to one of the most expensive places to live in this glorious country of ours…California!!

Sorry for sounding like a broken record if you’ve hung around a while.  But, it’s worth one last mention because it’s so true.  Everything is pricey in California…(oh dear, here she goes again!!)…gas. groceries. taxes (have I ever told you that when you buy ANY piece of lumber from a certain huge home improvement chain you will be charged a tax to each said piece of lumber.  Even though each said piece of lumber has already been cut and processed you are still charged at the check out stand a tax of $.04 per piece.  I know…wah, wah, wah, but boy you start to think twice about conservation once you’ve lived here a while!

So my point to that rant was that I don’t just say these words in black on my blog to try and impress you…I live it everyday!  So I have to get creative with my DIY or I will go insane!

Here we go….for my latest little DIY I grabbed one of my IKEA pots (doesn’t everyone in the world have at least one of these things?) and a favorite product of mine-my gold Painty pen-and went at it!

ikea vase_painty pen

I am not endorsed one penny for this post; I just love these little guys and want to share.  These oil-based paint markers come in every color and they dry super fast. You can use these on glass, wood, plastic, you name it!

ikea vase_paintingCheap Therapy.

After 10 minutes of coloring in the lines (literally) I was done!

ikea vase_holding tightGauging by the jagged edges of my lines I’d say this was a two cup of coffee morning.

ikea vase_succulent

I stuck a succulent from the backyard in this glamed-up pot and called it a productive DIY day!

IKEA vase_gold stripes

closeup

My happy little pot now sits on my bathroom counter top alongside my recent DIY artwork.   I think I’m living out a childhood rebellious period because I’m drawing on things I probably shouldn’t.  Click here to find out what I mean.

ikea vase_overlay

hugs

DIY | Modern Feather Art

overlay

Like most of you out there I am addicted to anything gold!  I sometimes find myself standing in our garage with a can of gold spray paint in my hands just itching to “shoot” something.  I am also drawn to art!  Anything custom, weird, unique and meaningful that speaks to me and I’m all over it.  I decided to combine the two for this latest DIY art project.

I am so lucky to have a first grader attend a school where peacocks roam freely.  No joke.  Her school is connected to a working ranch and you can always find on average 10 peacocks roaming amongst the kids.  It’s the most amazing thing.  Anyhoo, my 6 year old has amassed quite a collection of peacock feathers.  I was either going to make a feather duster with them or use a couple for an art piece.  So I decided to take the less tacky approach and make a custom piece of art.

spray feather

I gave one of the peacock feathers a quick spray of gold

on paper

then blotted it onto a piece of white glossy contact paper.  It shows the detail much better than a regular piece of white paper.

simplicity

I added a word of inspiration.

gluing string

Then glued some jute string around the edges (it just adds something extra, plus hides my imperfect cutting job).

done gluing

in gold

Yes, more gold!  I gave an old crappy frame a quick spray of gold, but decided to add some black electrical tape to the edges for some funkiness.

done

I just love it and love that it has a sweet memory attached to it.  So what better place to hang this sweet custom piece of art than our master bathroom!

on display

I know it might sound tacky, but this is where I start and finish my day.  I hung it next to my favorite framed saying so I always start my day with a boost of inspiration.

closeup

This project was completely free and took 20 minutes.  I can pass for now on making that feather duster!

overlay

hugs


“Brass Urchin”

overlay

I think this is probably the funniest (and weirdest) DIY I’ve done to date; but aren’t you getting used to those by now?  🙂  [Hula hoop orb chandelier] / Sharpie marker Moroccan rug] / [Embellished IKEA with stained paint sticks]

I probably don’t have to tell you that decorative brass urchins are all the rage right now.  Well I love design trends as much as the next gal (or guy) but I love to cheat and try my hand at making my own before I buy.  It’s just more fun and rewarding to me.

Brassurchin__66897.1369435083.450.450[via]

1b6fe7c4131b[via]

brass sea urchins 2[via]

So the average price for these guys is $30-$50.  Mine…$3.29 (plus tax)!  I was inspired to try DIY’ing one from this toy my kids always want whenever we go to the grocery store…

glow ball

I have bought countless numbers of these things only to find my son has chewed off the “legs” within 2 days.  So this time I purchased one for Mama to hack!

All I did to this poor toy was give it a coat of my favorite spray primer

before

primed

I let it dry for about 30 minutes then sprayed it with some gold paint

gold

Done!  Isn’t it funny?  My kids haven’t discovered it yet (probably because it’s not neon orange or yellow).

sitting pretty

done2

downshotI think I will try to make a bigger one, but use a large dog toy instead.  That was my first choice but I couldn’t fine one at my local store.

Free-Shipping-Dog-toys-pet-toy-vocalization-sphere-colorful-rubber-vocalization-sea-urchin-ball-rubber-ball[via]

I might just sift through my kids’ toys to see what else I can spray gold!

overlay

hugs

Swapping out lamps

I know I’m not alone when I admit that I re arrange my house…A LOT!  One thing I especially love to switch out is lamps.  They’re easy to lift+carry and can change the overall look and feel of a room.

We have accumulated a bunch of lamps within the past year because our brand new house lacks ceiling lights!   I can count on one hand the number of rooms that have a ceiling light…dining room and kitchen eating nook (aka kids’ playroom).  That’s it. So I am always on the hunt for inexpensive, funky lamps. It’s cheaper than hiring an electrician to install j-boxes!

That being said, I swapped out my two matching eBay brass table lamps from the dining room

IMG_6678[1]

IMG_6646[1]

to the family room…

head on

couch included

flag

downward

I “styled” (aka, threw a bunch of crap together and hope it looks good) the end table I made with some colorful cookbooks and wire basket to hold my favorite magazines.  I also clipped a sapling from the magnolia tree in our front yard and just love the waxy look of the leaves.

moo and killian

Half way through my picture-taking I had to stop and snap this.  I wonder what each is thinking.  Maybe, “Is she ever going to stop?”

So the lamp that used to be on this table was this one I ordered from West Elm.

IMG_6103[1]

I love the way this looks, but I was only able to afford one lamp so the end table on the other side of the room was without one.  It looked pretty unbalanced.  So swapping out the dining room lamps for this one made perfect sense.

And here is what it looks like now in the dining room…

dining rm

buffet

aerial

plates

Swapping out one lamp completely changed the feel of the room.  It went from a bit formal to casual and relaxed.  That’s what I love most about shopping the house…it’s free and (almost) always ends with a happy result.

hugs

Entryway

I’ve been holding off sharing any room updates lately because it seems like EVERY room in this house is in a constant holding pattern.  The entry way was one such space until I had that “Aah Haa” moment last week and simplified the whole thing.

This is what the entry way looked like recently…

entry

All I can say when I look at this picture is, “Less is always more, Amy!”  So that’s what I did….I stripped everything away and started over.  Enter yet another piece from my husband’s bachelor collection…the mirror that is supposed to go with a dresser.  That dresser is currently being used as a sideboard in our dining room.

Here is the simplified version of our entry way as of last week…

straight on

I was a busy bee patching all sorts of holes in the wall (from tiny nail holes to humungous drywall anchor screw holes), then I found two studs to add yet two more screws in order to hold this H.E.A.V.Y. mirror!  My 3 year old son is turning into quite the helper as he kept asking me if he could hold the mirror for me.  He’s going to make one awesome husband someday!

Here are a few more pictures of the first space you see when you walk into our home…

view down hall

Technically our home is a shotgun house.  You could literally fire a shot from the front door and it would exit the back door!  To break up the brown tile, linear feel of the house I bought this faux cowhide rug from Rugs USA.  I also added the fiddle leaf fig tree (Home Depot, $60) in the dining room to break up the long feel of the house.

top shot

I still have to finish my paint stick embellished IKEA unit, but what is finished is still holding up just fine!

lamp

close up

The starburst mirror you see in the mirror’s reflection is one I made from balloon sticks, IKEA mirror and decorative trim.

peace

This piece came from Joss & Main and I love having it right when you walk in our home.  I know what it stands for, but my daughter made me smile when it first arrived and she said, “Mama I make that sign with my hands all the time in school!  It means, ‘shhh!!'”  Out of the mouths of babes.  🙂

horse

This lovely came from Home Goods.  I guess I’ve developed some sort of animal head fetish because this guy is one of six I have scattered around the house!  The hubs just doesn’t get it.

distance

up shot

There you have it!  Short and sweet today.  I promise to have a few more room updates coming soon.  There…once it’s been written it’ll get done.  🙂

hugs

Board+Batten

NEWSFLASH…I am officially on the board and batten bandwagon!  (try saying that fast 5 times) I have loved the look of it for quite some time now, but have never been 100% motivated to install it yet.  Until…I found the perfect, non visible to many visitors, small space…the kids’ bathroom.

These are a few pictures that I have had pinned for a while now that I referred to for the design.

Julias-Playroom-After-611x459{via}

basic-board-and-batten_thumb1{via}

And my all time favorite

DSC_0247{via}

I decided to experiment on a small wall in the kids’ bathroom.  That way I can work out all of the mistakes in a room that my little ones only see.

IMG_7720[1]

I had a furring strip in the garage and cut it the right size and wedged it in between the wall and door trim.  Then I secured it to the wall by screwing 4 screws through the furring strip and into the studs in the wall.  I’m sure this is overkill, but I plan on attaching towel hooks for the kids and know they will pulling and tugging so I don’t want this things coming out of the wall.

IMG_7723[1]

IMG_7726[1]

IMG_7727[2]

I then attached the vertical pieces to the same studs.  This is a point of discussion out there…to angle the bottoms or not.  I decided to go for the angle and cut each at 45 degree.  I still have a lot to do, but am happily surprised at how easy this is.  To install the top board and two vertical pieces took about 45 minutes.

IMG_7728[1]

I still have a lot more to do -install two more vertical pieces, holes to fill, and paint.  I am hoping this project won’t linger like my other half-completed projects.  I’m hoping not!

hugs

Kids’ Chore Chart [and soup can DIY project]

overlay

I’ve heard all the cliches / sayings / advice about organization….”an organized home is a happy home,” “an organized home is a stress-free home”…blah, blah, blah!  Well, I hate to admit it, but it’s so true!  Add two very active children to the mix and the organized home quickly took a back seat for many years.  Well, I think it’s safe to say that we all have our limits and I reached mine not too long ago.  No breakdowns.  No tears, just sick of picking up the same toys over and over again and cleaning out my daughter’s backpack and lunch box for the billionth time.

It is a personal decision whether you require your kids to do chores or not.  My husband and I fall into the category of “everyone pitches in.”  So to save some of my sanity (and time) I made my kids a chore chart.  (*Note:  I cannot remember what site I downloaded these printables from so if you do know, please let me know so I can properly credit them.)

tinkerbell_closeup

I purchased 2 plastic frames from Michael’s and four dry erase markers.  I added each kid’s name to the chart and slipped them into the frames.  All I had to do at this point was figure out chores for each kiddo.  My 6 year old daughter was easy:  dirty dishes in sink, pick up room, homework with a good attitude, clean out backpack, clean out lunch box.  My 3 year old son is just figuring the chore / reward thing so I kept his simple: dirty dishes in sink, pick up toys.

To reward their good work I came up with a system: complete 1-5 things = $0.50 | 6-10 = $1.00 | 11-15 = $2.00 | 16-20 = $3.00.  I tally up the number of things they did Friday night and give them their allowance.  I’m amazed that it is working and my kids aren’t whining (too much) about helping out.

side view

Now for the DIY project!  There are a ton of tutorials out there that show you how to create these decorative luminaries out of soup cans.  As you can see, I used mine as marker holders instead.

Sorry I forgot to take pictures during the process so I’ll try to describe the process (it’s so easy!)

  • Obviously you need a couple empty soup cans, washed thoroughly and labels completely removed
  • Fill the soup can with water and stick in the freezer for at least 2 hours
  • Remove from the freezer and grab your hammer and nail
  • Start nailing your design onto your tin can (*note: I free handed my designs, but you can always lightly sketch any design you want)
  • Once you’ve completed your design simply let the remaining ice thaw
  • You will most likely be left with a bulge on the bottom of your can.  Don’t freak, it’s just from expanding in the freezer.  Just take a hammer to it and it’s gone.
  • Now punch two holes at the top of each can for your handle (I’ve seen some people use thin wire, but I like the look and feel of jute rope)
  • I spray painted each can a bright turquoise and done!

aerial

tinkerbell close

My daughter wanted Tinkerbell

dinosaur

My son wanted a dinosaur

So I’ve managed to create ONE organized space, next is to tackle this unbelievable mess lurking underneath our staircase…

mess

I will be repeating this to keep me motivated: “An organized home is a stress-free home!”  🙂  Stay tuned!

hugs

Organizing my daughter’s closet

overlay

Kids and clutter go hand in hand right?  It’s nothing new.  I don’t think any expecting new parent (including myself) had any clue just how much blinky, talkie, fuzzy, plasticy stuff would invade our lives once we had kids.  The stuff is never-ending and can be overwhelming at times.

Being the lover of all that is IKEA we had an Expedit shelf on hand.  I think within 6 months of moving in to our house this thing had been moved to just about every room.  The best and most efficient use of it though hit me when I was picking up my daughter’s clutter (for the 1,875th time).  I was just about to toss her Barbie bath tub into the closet when I had the idea of using our Expedit to organize her toys.

Thankfully I was able to shove it in her closet without damaging any walls. It was meant to be.

side view

I used these red boxes (also from IKEA) to hold her dolls, doctor set, doll clothes and purses.

aerial view

I whipped out my chalkboard labels and got my girl organized!

angle

closet

To free up floor space I purchased these hanging closet organizers from Land of Nod to hold her growing shoe collection (the apple doesn’t fall far from that tree!).  The green boxes hold games, crafts and electronic toys.

angled view

To add even more fun to that side of her room I purchased these gold vinyl dots from this Etsy store.  Her closet has become the happiest spot in the whole house, although sometimes I think her closet looks like it has a case of the measles.  But, happy nonetheless.

overlay

hugs

Simple Kids’ Reading Nook

overlay

kids reading nook

Today’s post is short and sweet (kind of like the two people I had in mind when I created this space).  I love the idea of giving my kids a spot all to themselves where they can sit and read a book.  I carved out a little spot on our second floor just outside of our guest room.  We already had the bookcase secured to the wall so it wouldn’t fall on either of my kids (they are little monkeys after all).

I stole their bean bags from their rooms and added the flokati rug as a nice spot to stretch out and read.  The “READ” letters were a recent purchase from Michael’s that I spray painted a bright gloss red.

read sign

While I was at Michael’s I spotted these inspirational wood signs that I spray painted different colors.  It’s always nice to surround yourself with inspirational things.

love

dream

I was thinking about painting the far wall with chalkboard paint, but am not sure about all the chalk dust that would collect on the rug.

My kids love this space.  I was curious what they were up to the other day as it was really quiet all of a sudden (always a concern when they’re quiet right?).  How happy was my heart to see them curled up on their bean bags “reading” one of their Oma’s German novels.  Another success.

kids reading nook

hugs

Make a “Lamp Wrap” {using an oatmeal container}

overlay

I know, you’re probably thinking, “Yep, she’s officially lost it.”  Like most of my DIY projects, I cannot explain what part of my brain this one came from.  It was fun though and cost $ZERO!

The lamps in my son’s room have never felt right to me.  They are dated in my opinion and not chunky enough…and I love a good chunky lamp!

before

Like I said, this is a fun, free, quick project.  All you need is an empty large oatmeal container, hot glue gun, rope (I purchased a roll from Home Depot) and of course, a lamp!  My lamp bases just happened to be the exact same height as the oatmeal container so this was a snap!  If your lamps are taller then just use 2 oatmeal containers and cut one to size, then just glue them together.

supplies

To start, I cut the bottom out of the container.

bottoms out

Then glued an end of the rope to the container.

starting

Now just glue. Attach rope. Repeat.

beginning

almost done

When you’re at the end of your rope (ha ha!) put a large glob of glue to be sure it sticks really well.  That’s it!

done wrapping

I just love the way this looks.  I think I’m going to feed the family oatmeal for breakfast the next 2 weeks so I can make some more of these, but use them around the house.  Pen/Pencil holder? Vase? Craft supplies container?  Yes. Yes. Yes.

Next I removed the old shade and slipped what I’m now calling my “lamp wrap” over the base.

it fits

It fits!  I was a bit worried that the decorative ball and pull chain would show, but after rummaging through my stash of lamp shades, I found the perfect one.  It’s a white linen one I purchased ages ago at Home Goods.

closeI was amazed at the transformation!  It makes me chuckle knowing I turned a blah lamp into something chunky and cool for free!!

after

Here it is in my son’s room.

before and after

And here is the before and after!  Now to sound like a child of the 80’s…it’s totally awesome, huh?  🙂

overlay

hugs

Our Halloween House+Quick DIY

This has nothing to do with Halloween (or anything really), but how excited was I to see this while standing in line at the grocery store today…

domino

Finally! Yipee! Hooray! (I know, get a life!)

Anyhoo, I thought I’d share with you guys our Halloween decked-out abode and a cute Halloween DIY.  I love Halloween as much as the next person and I do love decorating our house, but I try to keep it simple and easy on the wallet.  I like purchasing one “statement” piece and adding a few things around it.  My Halloween statement piece is obviously the large spider web.  I purchased it at Target last year.  Let me tell ya, people in California start decorating EARLY so by the time I got myself to the store to buy some Halloween decorations, they were pretty much all gone.  All I could find was this spider web and I wound up getting tons of “Ooohs” and “Aaahs” last year (and hopefully this year too).

house

web_close

It’s nothing too grand or elaborate, but just enough to make a little statement.  I don’t go overboard with the decorating and don’t want to stick out as “that house” in our neighborhood (nor do I want to get T-P’ed).  🙂

house2

This year I added some “Warning” tape and tacked it to the outside of our second story windows.   It was very challenging to say the least trying to attach this stuff to our stucco.  (I hope the hubby isn’t reading this post).

Now onto a simple Halloween DIY…

overlay

These tombstones were such a blast to make and even more fun to write our epitaphs.  OK, that sounds weird.

I purchased 4 large sheets of foam core board at Michael’s  (20″x30″ and 1/2″ thick) and sketched the shape of a tombstone onto each then simply cut it out using a utility knife.  I wrote our epitaphs first then used some white and red spray paint to add a spooky effect.  We each have our own…

frank closeup

My Poor Husband’s

ivana

Mine

electra

My Daughter’s

cliff

My Son’s

To secure these into the ground I used some stakes we had laying around and my good ol’ duct tape.

stake

I know this looks pretty cheesy but I only bring these tombstones out on Halloween night so nobody will even see this.  I just wanted to share these with you today.  Not to mention, I don’t want them getting obliterated by our sprinklers in the meantime.

side view

close up

frank

overlay

amy

My Artwork + My Fav Artist

I.love.art.  I adore a good abstract, but am also drawn to a classic Monet or Van Gogh.  I even consider my little blog to be my own piece of artwork.  I spend hours (too many) tweaking it, refining it and molding it.  Hint. Hint.  (More on that very soon).  Of course there is always a heart-wrenching price tag attached to any desirable piece.

I am all about the cheap and easy, but it also has to look good of course.  I decided to fill our new home with art that I’ve either created or purchased for dirt cheap.

Here are a few of my own creations

IMG_6619[1]

With glass of favorite red wine in hand I painted this picture in less than 40 minutes.  My inspiration for it was Vincent van Gogh’s “Almond Blossom.”  This project was apx $11 (the cost of some sample jars of AS Chalk Paint).

almond-blossom

IMG_6612[1]

Ahhh, I still love this drawing I did several (aka 25!) years ago.  I wish I could say this was a self-portrait (in my dreams!) but it’s from a shampoo ad in some magazine.  This picture had been hiding for at least 25 years in my old portfolio  until my daughter found it.  She wanted to look at my artwork and I was happy to share it with her.  When she asked me why I didn’t have it up on our wall I said, “You know what, I don’t know!”  It now adorns a side table in our dining room along with the painting above. This project was free!

IMG_6685[1]

watercolor

I painted this watercolor…um…I have no clue when!  I think I painted this five or six years ago when my girl was napping.  This is now hanging in our living room.  This painting was free!

fam_room2

fam_room3

Being married to a legal alien German I thought it fitting to include a touch of “home” for him (although the way the German flag is hanging in this poster frame is VERY incorrect he tells me.)  The flag was a gift my in-laws brought for our kids last year when they came to visit from Germany.  This project was free!

Now onto my kids’ rooms…

a_artcollage

I purchased the chip letters at Home Depot for around $5.00.  I glued them onto a canvas I had then painted it all this soft lavender (the color I thought I was going to paint my girl’s room).

The abstract painting below that is a paint-by-numbers kit I bought for my girl recently and she had her own idea what that meant.  I have to say I love her interpretation much better.

a_art

The 3-D paper butterflies were an Etsy purchase.

red_art

My son also likes to try his hand at creating a masterpiece.  I painted a cheap canvas red and gave it to him and said, “Go crazy!”  This is his little interpretation.  This project was free!

I am in the process of re doing his room.  I wanted to give my sports-junkie little man some inspirational artwork so I scoured the internet for some cheap prints of one of my favorite artists of all time. Know who it is?  NORMAN ROCKWELL!  His work is timeless and epitomizes Americana.  I was lucky enough to score 4 of his sports prints for $15+$5 shipping off eBay.  When they arrived I was so excited and knew I had “nailed it” for my son’s room.

These are the prints that I purchased:

choosin up

first down

oh yeah

missed

Fun for a little boy’s room, huh?

I guess if I have a point to this post it’s that you can create art too.  Free art. It’s all around you and inside your head just itching to pop out!  I hid my work for over 20 years until it took my beautiful 6 year old to inspire me to put myself out there.  Ok, it’s only displayed in our house, but it’s a huge deal to me when we have people over and they ask “who drew that portrait “or “who painted that piece.” Art is very personal, subjective and means different things to different people.  So why not surround yourself with things that inspire you and make you happy?  I finally did just that.

hugs

DIY {Sharpie} Moroccan Rug

overlay

I have been in love with this Moroccan shag rug for quite some time.  It’s neutral but has a fun graphic pattern and can pair easily with traditional or modern decor.

22510_XXX_v1-w2000{via}

200MTVS28A{via}

Here is a different version of it (the ever-popular Souk rug)

Shot_6_008{via}

img21o{via}

The last one is my favorite (I would just be scared to vacuum it for fear that the fringe|tassles would get caught in the rollers!)

Anyhoo, while my oldest was at school last Friday I decided to be very “productive” and makeover our little shag rug that has been banished to the garage since we moved in over a year ago.  We purchased a few of these ivory colored shag rugs from IKEA a few years ago and quickly regretted it.  Black Labrador+Two Kiddies+Clumsy Mama= Mess. Mess. Mess.  These rugs quickly went from ivory to tan to gray in no time.  But I have not had the courage to just toss them yet.

hampen-rug-high-pile__0185428_PE337392_S4I have wanted to purchase one of these Moroccan shags for a while now, but I have come to a point in my life (for those of you who have been hanging around a while….sorry for sounding like a broken record) where I can’t justify $200-$1,000 for a rug (much less anything else!).  WHY BUY WHEN YOU CAN MAKE, I say!

So without further adieu here is my DIY Sharpie Moroccan Shag Rug:

First grab any less-than-desirable accent rug you have laying around, preferably one that is beige, ivory, you get the hint.

IMAG2579

My rug measures 32″ x 60″ (makes the math on this DIY so easy for me).  I found the half way point on the short side (16″) and put a dot.  I then marked the half way point of the 16″ (8″) then put a mark at 24″.  My first grade teacher would be so proud!  You should have 3 dots along the short side of your rug (8″, 16″, 24″).

IMAG2580

My little boy’s hand (aka Mama’s Photo Bomber!)

Repeat these steps along the opposite short side of your rug.

Then do the same math along the long side of your rug.  The long side measures 60″ so I marked at 30″, 15″, 45″.

IMAG2581

(Sorry for the quality of some of these pictures. I was clicking pretty fast before my little photo bomber started mooning me again).

Now you need to mark in the middle of the rug.  Simply mark where each dot you made on the short side intersects with a dot on the long side.

markings

Once you have all your dots, you are now ready to start drawing on your rug.  I must admit, I was a bit nervous to start doing this, but after the first line it’s empowering.

IMAG2588

IMAG2584

Now it’s just playing “connect the dots.”  Connect one of the dots on the short side of the rug to the first dot on the long side of the rug.  Make sense?  I know, it’s not rocket science.

IMAG2585

Simply make a zig zag line down the short side of your rug.  You should have a perfect symmetrical “W”

first row

Now time to make your “W” into 2 diamonds.

two diamonds

IMAG2587

Next will be another “W” row on top of this one, until you end up with 4 diamonds on your rug.

IMAG2589

By this time I really had to concentrate, as the infamous Sharpie fumes were making me a bit loopy (even with every window open).

IMAG2590

The simplest way to complete the rest is to simply connect the dots in the center of each triangle|diamond as seen in the above picture.

IMAG2591

Repeat the process going in the opposite direction (so it looks like you are making one large “V”)

IMAG2592

IMAG2593

Connect the rest of the dots and you should be left with your very own DIY Sharpie Moroccan Rug!

IMAG2598

IMAG2603

I am not endorsed by Never Wet, but I just have to say this stuff rocks!  I’ve used it before to “kid proof” (aka water proof our bar stools).  If you want to water proof your rug then I would recommend using this product.  It’s a spray and takes only 30 minutes!  Before doing this, I did put my lovely “new” rug outside for a couple days to air out the nasty smell.

My only problem is I’m not sure where it looks best…

IMAG2606In my kitchen

living room

living room2 Or my living room

Now that I think about it, I have another one of these rugs in the garage!

overlay

hugs

Coffee Table|Fabric Wrap

overlay

Honestly I cannot tell you where some of my decorating ideas come from.  From my DIY Art Caddy to gluing stained paint sticks to my IKEA furniture, some of my ideas literally pop into my brain and then it’s “go time!”

Today’s project was no exception.  While choking sipping on my wheat grass shake this morning I had a craving to wrap my family room coffee table with a band of fabric.  You can tell why…

fam_room2

fam_room4

fam_room3

couch

fam_room5

coffee_table

It’s a dark blob!  I think my “craving” to wrap this sucker came from the fact that it looks like a chocolate candy bar with legs.  🙂  I originally thought about building a sliding table to fit over it, but that will not happen for at least a year (or two…no motivation right now).

I am all about quick, cheap and temporary projects (if you haven’t figured that out by now).  Quick because…well who has three spare hours in the day to DIY.  Cheap…says it all.  Temporary because…I get bored with one look after a while and don’t want to spend a ton of time and money to change looks.

The best part of this project is it is quick, cheap (FREE actually!) and temporary.

So, after I got this idea I dashed into the garage to find a light colored neutral fabric and thought my scrap pieces of drop cloth would be perfect.  I had some left over from my stenciled drop cloth drapes.

materials

I also grabbed my staple gun, flipped the coffee table on its side and started attaching the fabric.

stapling

I stapled along the wood frame

staples

I repeated the same process on the other side, gently pulling to make it a bit tight so it wouldn’t bunch up.  Then I cut off the excess.

cutting

wrapped

I liked it, but I can never just stop at one step.  I ran back into the garage and went through all of my grosgrain ribbon and decided to add my favorite b+w stripe one.

all_done

Now that’s better!

all_done_room

So now our big chocolate candy bar coffee table has a wrapper!  🙂  I like this fun look and I like how it brightens the room up a bit.  Best part, this project was quick (max 10 minutes),  cheap (FREE!), and temporary (I’ll just rip out the staples when I get bored of this look).  Win, win, win.

overlay

hugs